retour à
  Images incorrectes ? Cliquez ici
Extention de banc de scie pour Sherline
un grand
Merci
à Sherline pour me laisser utiliser leurs excellents dessins
DÉSOLÉ, CET ARTICLE EST POUR L'INSTANT DISPONIBLE EN ANGLAIS SEULEMENT
Warning. Table Saw are very dangerous tools. If you choose to build one, do it at your own risks.
Those drafts are for private study or educational purposes only. I do not warrant the accuracy or the completeness of those drafts and in no event I will be liable or responsible for damages of any kind arising out of the use of those drafts.
Note: Even if those drawings seem clean and precise, they are NOT. It is just rough drafts, only made with perfectly square pixels (!) and a drawing program instead of paper and pen (no ink on the fingers anymore!). But as I don�t even have a lathe or a mill (yet), I do not have checked those lengths in the real world !
On any drawing that follow, click for a bigger picture. And use the back button to return here.
 Basic Idea:
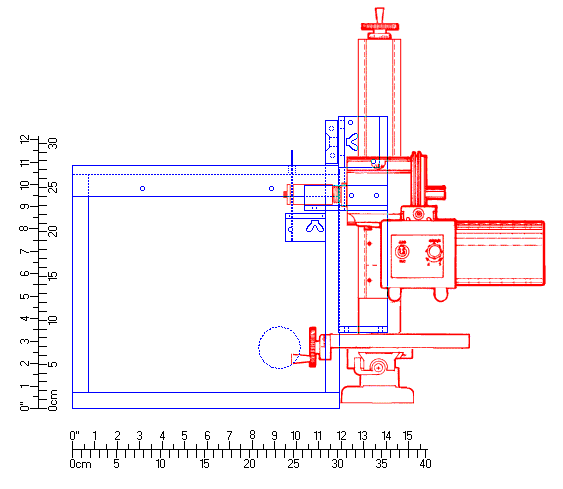
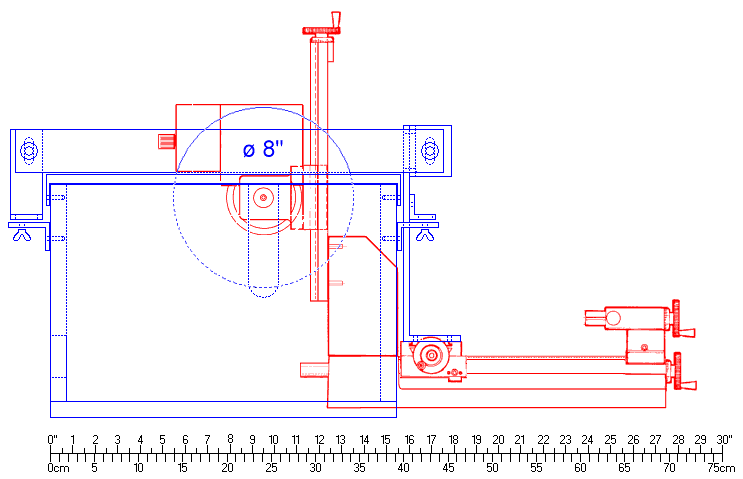
Use a lathe + Vertical milling column to create a Table Saw. A mill could be used instead of a lathe, but sizes maybe needed to be checked and eventually adjusted. But the design has no real critical sizes, and can fit any size of the table you like. Just adjust the related lengths accordingly.
The motor is turn at 90° to its normal milling position, so the blade attached to the spindle will be parallel to the lathe bed.
The Z-axis wheel is used to adjust the height of the blade.
The Y-axis slide travel is used to adjust the fence, attached to it and sliding on the top of the box
The maximum width of cut (between the blade and the fence) is proportional to the length of the saw arbor. The actual drawing fit a mill cutter arbor, 1-3/4" long and a 4" diameter saw blade. Use the printed rulers to have a rough idea of the sizes (they are not very precise).
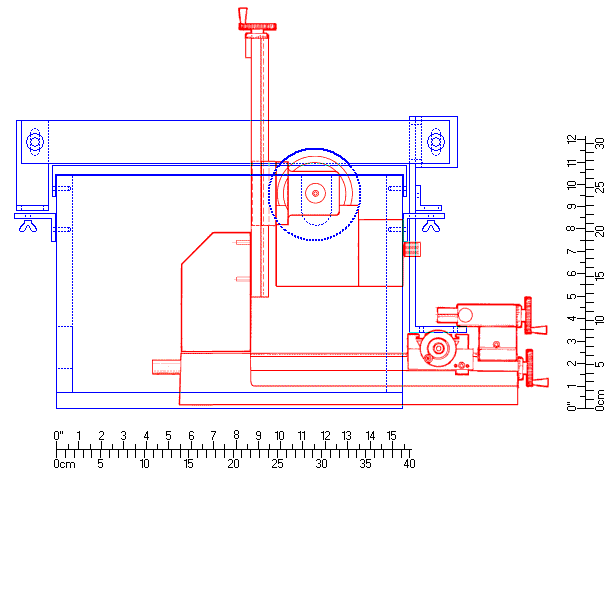
A longer lathe bed could fit a 8� saw easily, if the motor can handle such diameter !
In that case, a larger top slot on  to fit the diameter and a deeper slot on
  could do the job.
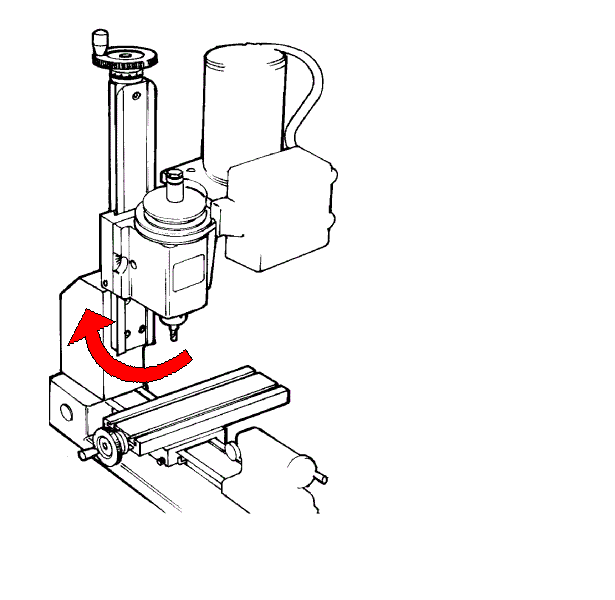
Turning 180° the milling column like the next drawing could be a solution for the shorter lathe, with a few adjustments, But I don�t know if it is possible to fix the milling column that way, and lathe could become unbalanced if not fixed securely to the table!
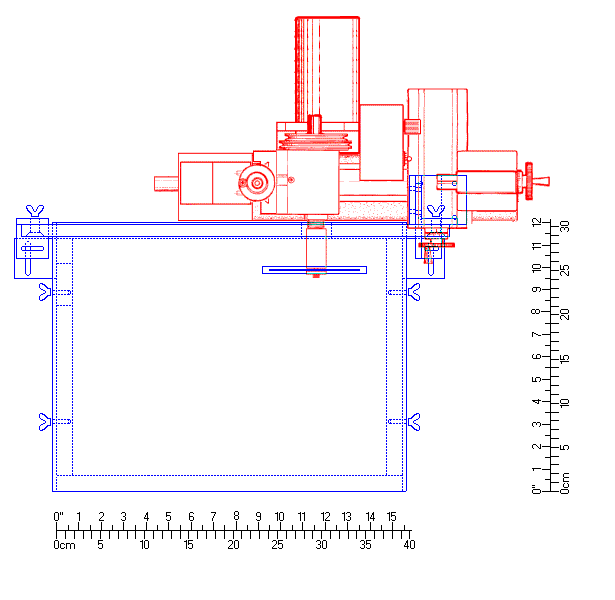
Here is a perspective view. For the curious, I don�t have fancy CAD programs like AutoCAD, so I�ve done all the 3D work just like the other drawings, manually, in a simple paint program like PaintShop Pro (using a bag of tricks). That explains some potential small errors in the drawings, of course a real CAD program never make mistakes ! (only the user do).
Usage:
To install the Table Saw attachment, open the top of the box, move the motor to the higher Z position, fix a blade to the spindle and slide down the blade, until the top of the blade is under the top of the box.
Close the top of the box. This is the tricky part, if the top is opaque, you cannot see the blade, except through the slot. A transparent window could help, and it could be easy to cut a very precise slot through a plastic window like the photo below for example, cutting it precisely while moving the blade up. This could avoid a too large slot. But this is another story�
When the blade is up through the slot at the height you want, lock the Z-axis and take your table fence.
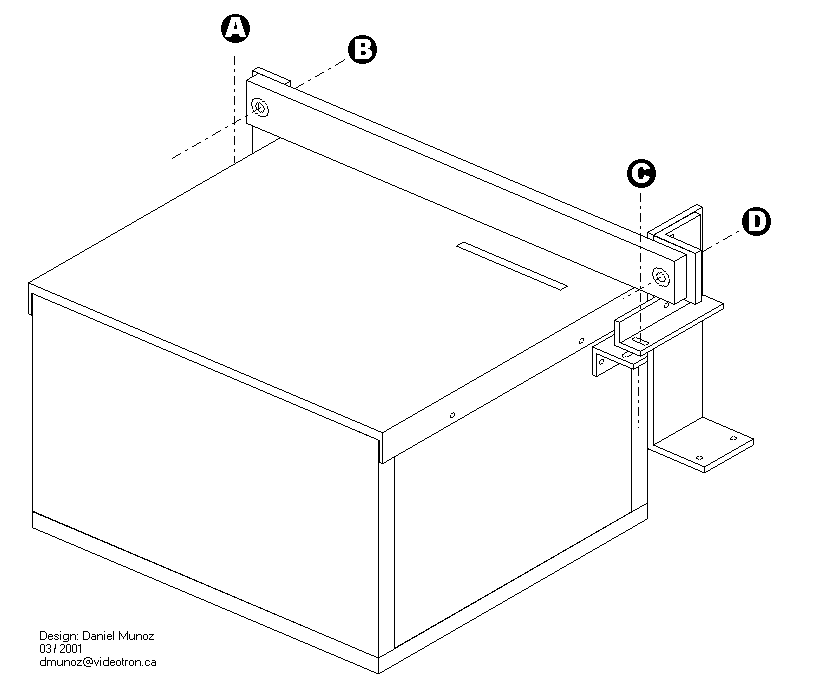
If you cannot find it (yet), here�s a clue; it is something like that:
There is some nuts+bolts attached to it (not present in the drawing), through axis  ,
,  ,
,  and
and  .
.
Remove the nuts+bolts from and , and keep loose and .
Put the bar at the back of the box behind the blade, close to the edge, and move the slide travel in X at Y direction until the beginning of the slide is just below item  , and fix item to the slide with some T-nuts.
When this is done, lock axes and , and put back in place nuts+bolts and , but keep them loose until you reached the proper width cut you want using slide travel hand wheel. Then, lock them and the ruler will by strongly fixed to the box.
During operation, it is easy to change a blade or empty the box from chips.
Remove nuts+bolts from or , and loose . The fence now can turn around axis and free the top. Just open it (motor stopped please!) and you have access to lots of chips, and of course the blade and its arbor. You can now move the motor up and do some adjustments.
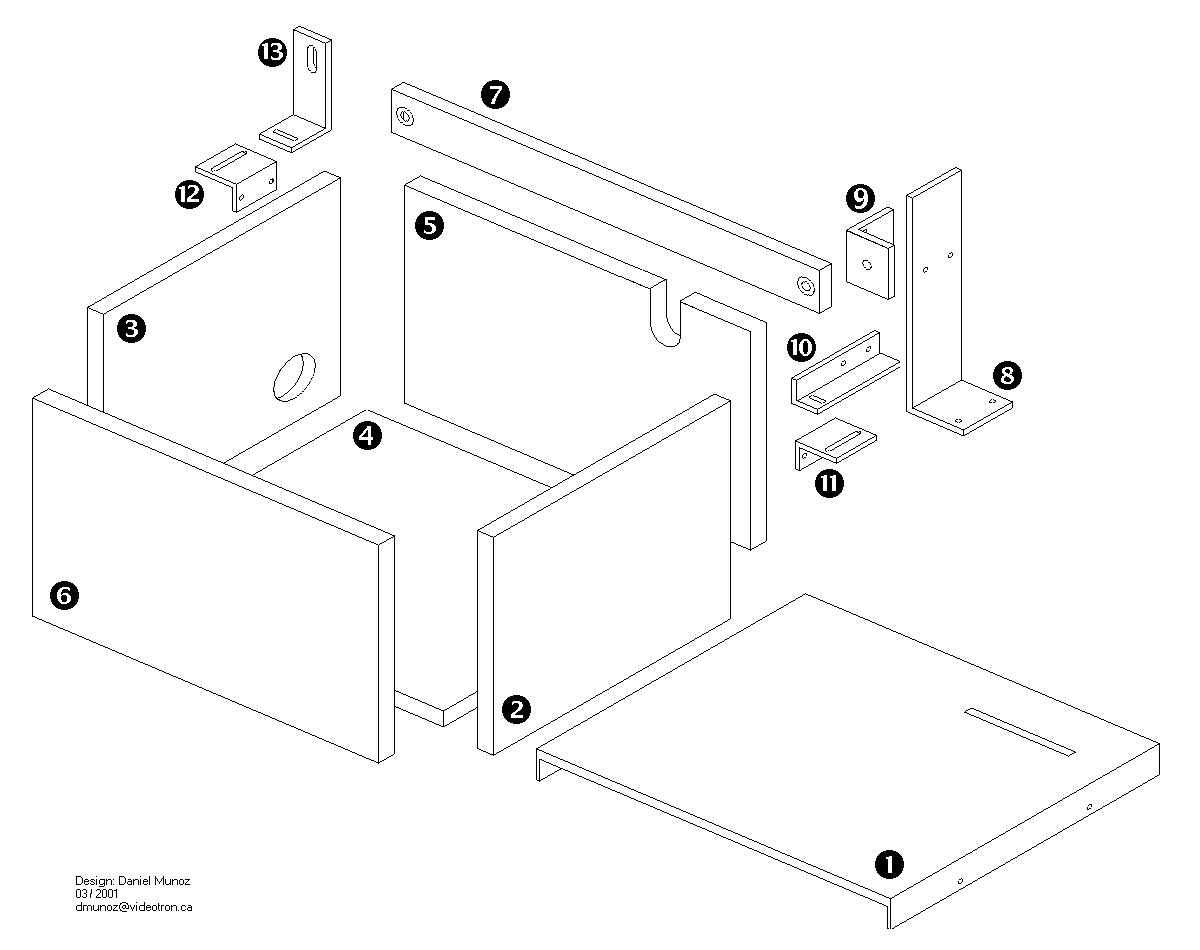
Detail of each piece, by its number:
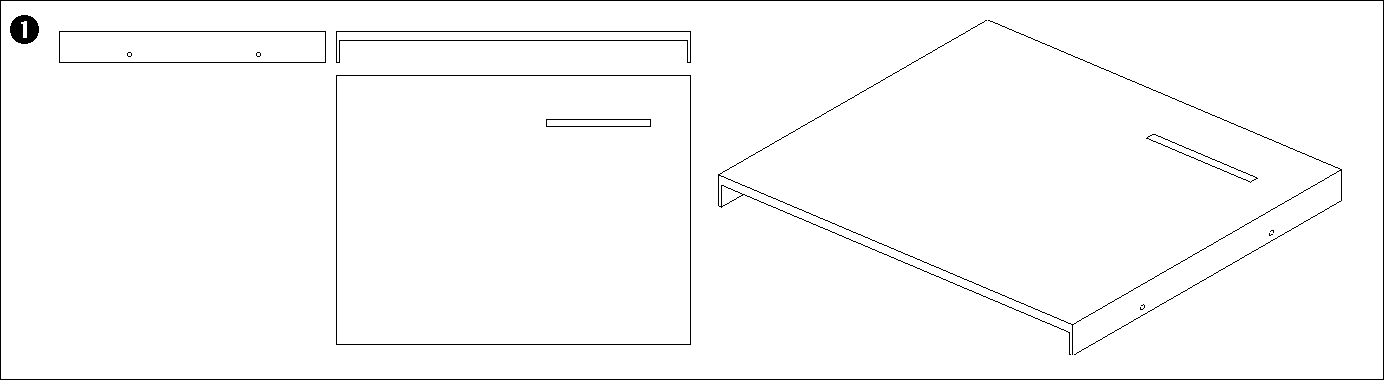
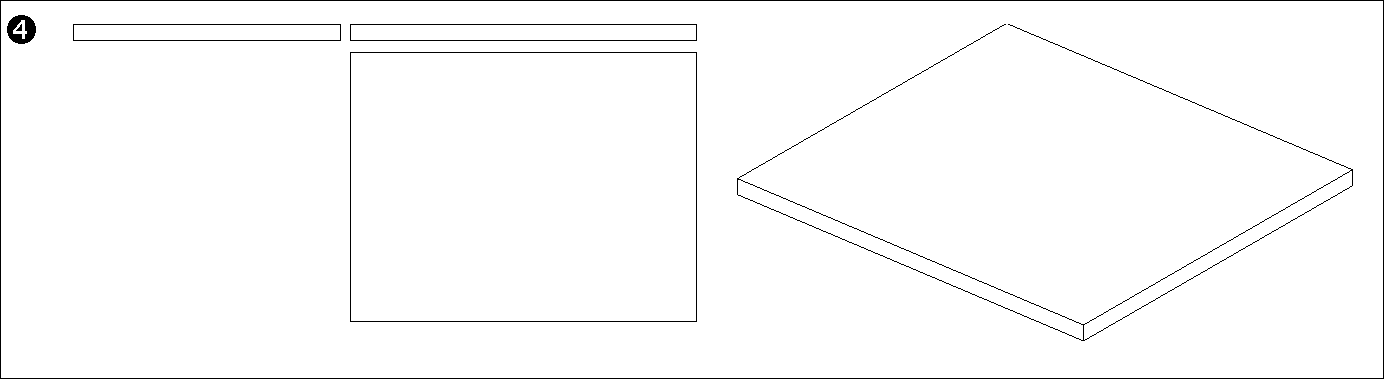
The top of the box. Need to be rigid, but as thin as possible to keep a height cut as deep as possible. Maybe a transparent slot window could help.
Another possibility is to use strong polycarbonate, and join the sides with aluminum angle.
It is also possible to use an existing box rigid enough, just cutting a slot on the back for the saw arbor, and a slot on to top for the blade. The design do not depend on an accurate design of the box, because both saw and fence are not attached to it.
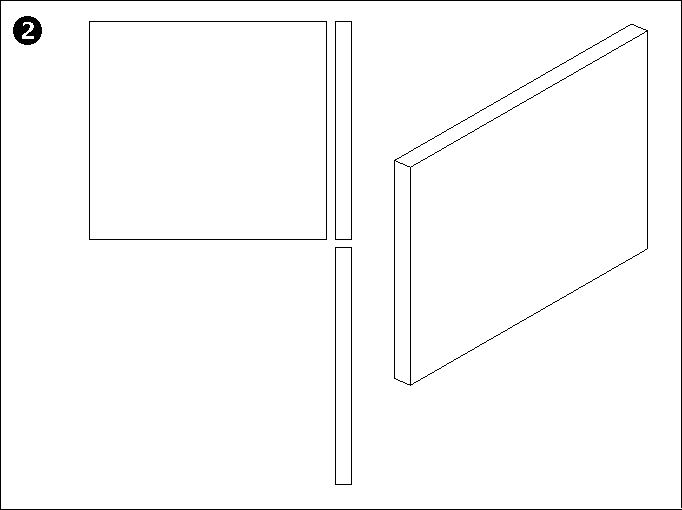
The right side of the box. Item  is fixed on it.
The left side of the box. Item  is fixed on it. Eventually a hole could be adjusted to fit a vacuum cleaner tube.
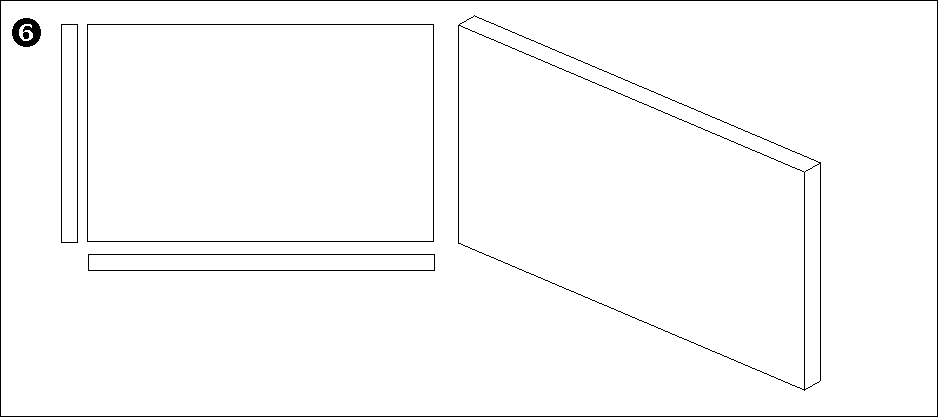
Bottom of the box. For extra security it could be wise to fix it to the same table as the Lathe, because if the box move during a cut, the blade will be stuck into the slot. This could be very dangerous!
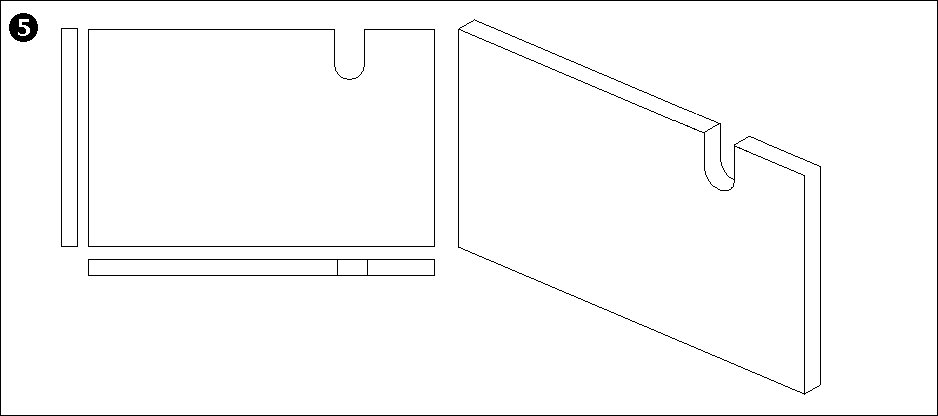
Back of the box. The slot is to let the saw arbor move freely up and down, it must be long enough for the top saw to move below the top level.
Front of the box.
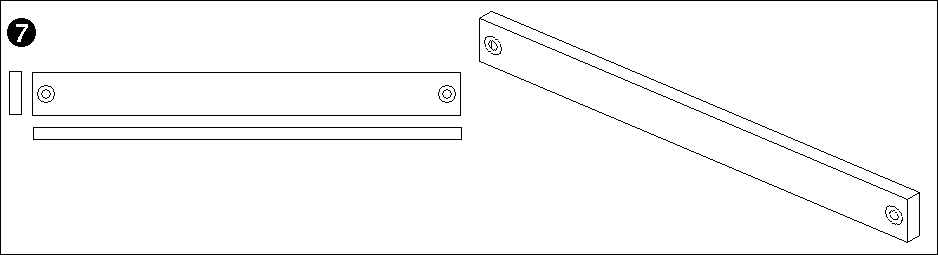
fence, to guide the material to saw. Could be an Aluminum bar. The bar is attached to the Y-axis slide travel and move using its hand wheel.
Fixed to the slide travel, with 4 T-nuts (I guess). This need to be very rigid. A plain aluminum bar could be used instead maybe, if the tailstock is not on the way.
Right angle attachment between  and . This is the most precise part needed, as the true 90° angle will be parallel to the blade. I think a final adjustment with the T-nuts could handle a fine tuning. For higher rigidity and/or tolerance, a plain aluminum bar could be used here too instead of an angle L bar.
This item locks the slide movement with the box fixture when the right width cut is reached. It must be locked in conjunction with 
This item locks the movement of the item  and is fixed to the side box
  (item identical to )
This item locks the movement of the item and is fixed to the side box  (item identical to )
This item locks the slide and rotation movement of , and prevents any bend during the cut while pushing some material through the blade. It needs to be locked in conjunction with
If you want a single bitmap with all the drawings, clic here to download a ZIP with a GIF bitmap in it (140KB)
The bitmap size is 2800x2900x256 colors. You�ll need a HUGE computer to handle a bitmap of this size!
I have almost finished a miter gauge design for this Table Saw, that also improve security against the blade cut (no protection exist in the previous design ! Watch your virtual fingers) and can also be used as a push-stick for very small materials to cut. Maybe later�
Have fun, any comment will be appreciated.