return to
  Bad pictures ? Click here
 L'Ambitieux, Le Trois-Ponts du Chevalier de Tourville
Decembre 10, 2002
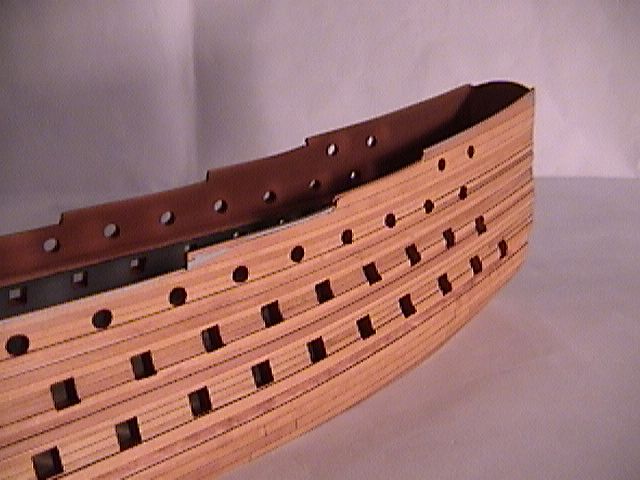
In this update the hull basswood carcass of the L’Ambiteux has been completely planked. The wood used for the planking is Swiss pear. I have several pieces of this wood so they all differ in colour quite a bit. I used my thickness sander (from Vandalay, no longer in business) and the PREAC saw to cut the planks. The PREAC saw did a nice job of cutting the planks but the fence and blade must be in perfect alignment or else it catches and stops the motor. Also, the feed rate must be monitored as with this hard wood, if it is fed too slow, the wood will burn because the blades are hollow ground. My pieces of timber were sanded to the width of the plank required and individual planks cut off with the PREAC. The planks were about .75mm thick for most of the work, but went as thick as 1.5mm thick for the wales. They are over thick for scale but all can be sanded down once on the hull.
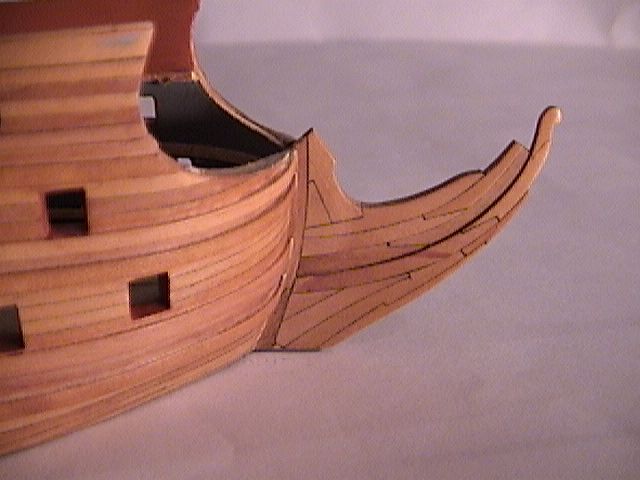
The previous update showed the planking the stern. Once this was complete, the ends were trimmed off and the sides were planked next. The first step was to locate and add the main wale. From that point, the ship was planked from top to bottom using the main wale as the datum. My method of attaching planks is to use both superglue and woodworking glue. The medium viscosity superglue was used as an instant clamp by dotting the back of the plank with little drops glue at strategic points. These points were usually the plank-ends and anywhere the plank had a natural spring to it and wanted to spring up off the hull carcass. The plank edges were coated with woodworking glue (Lee Valley Gap Filling glue) as well as on the back of the planks between the drops of superglue. The edges of all the planks were blackened using the edge of a pencil.
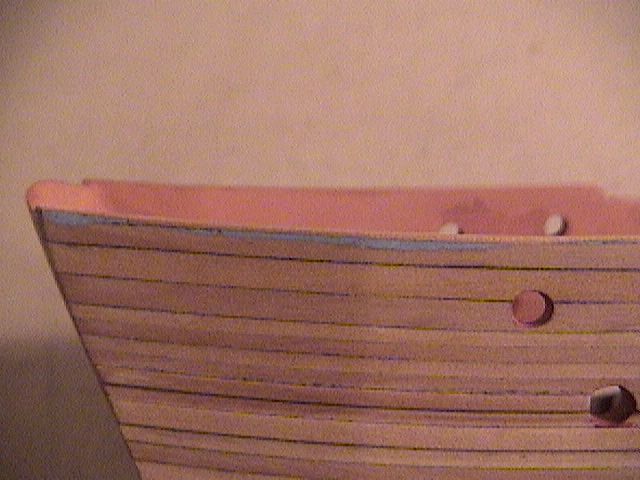
Once the whole hull was planked I opened up all of the gunports. Its important to do this carefully and just do a few at a time. I did too many at once and landed up making a few too large. I had to correct this with two-part epoxy wood putty (Minwax High Performance Wood Filler). This putty is great in that it dries in about 15 minutes and does not crumble when sanded, filed or cut like some of the other putties. Makes repairs very easy to do. My error is shown in the photograph below.

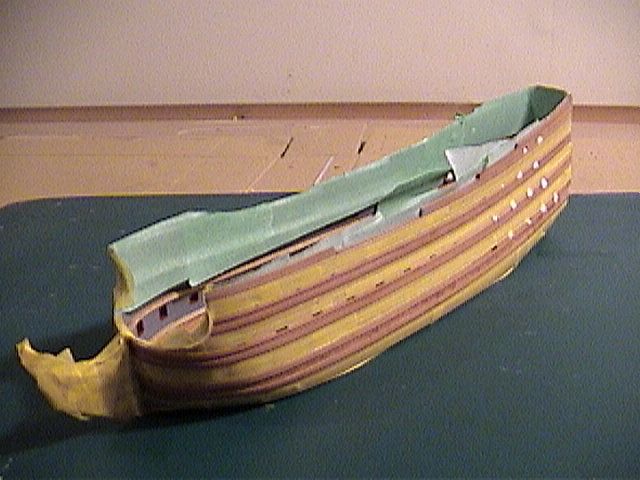
Once the gunports were cut out, I painted the inside of the gunports with a reddish brown paint (Humbrol 100 Red Brown). This paint is more or less similar to red ochre. Some artists and period models show a much brighter shade of red, but I’m not convinced this is correct. I believe the brighter red was used by the artists of the period as artistic license. This coat of paint highlighted several flaws in the gun port lintels that were filled with Tamiya plastic modeling putty and sanded smooth. This process was continued until all of the gunport lintels were free from major blemish. A final coat of red brown was applied to finish off the gunports. There were other gaps in the planking, but luckily they were in areas that were to be painted black, like at the top of the hull sides. Once all the putty and paint were dry, it was time to sand down the hull and smooth off the planking.


Don’t make the same mistake I did and sand though the planking! In the photo below, you can see the where I did this (top right hand corner of the stern). This was not a fatal mistake as this area will be covered up with decorative mouldings in due course. Once sanded down, the hull was rubbed down with #00000 steel wool and treated with two coats of tung oil (Lee Valley tung oil sealer).
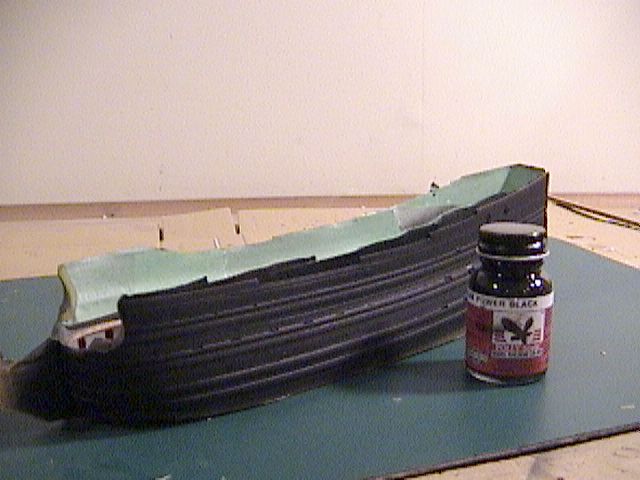
After the tung oil had dried, it was time to so some basic hull painting. It’s easier to do it now when there is nothing on the hull sides to get in the way. No doubt the paint work will get marked up, but likely nothing that a bit of touch up with a brush won’t fix. I had to make some decisions about the exterior paintwork. This ship was never built and thus I had some freedom as to how to paint my ship. Boudriot’s plan sets features a model built by M. Bernard Frölich (also author of L’Art du Modélisme) is a good guide. I used this as a guide but I changed things a bit by rendering the whole of the middle and channel wales as broad black streaks, whereas M. Frölich renders just the raised upper and lower strakes of each of these wales in black. Finally, M. Frölich shows his stem assembly in black. I was going to paint it black but just couldn’t bring myself to do it and cover up all the joinery I did, so I left it finished bright. There is no right or wrong as the ship was never built and illustrations of ships of this period show a myriad of different ways the wales, stems and sterns were painted. The next series of photos showing the hull being masked off and painted. The best masking tape I have ever used is Tamiya masking tape. Its flexible, medium tack, and the adhesive is so well spread on the tape that I’ve never had a problem with colour bleed. The black paint is Polly Scale acrylic Steam Power Black airbrushed on the model.


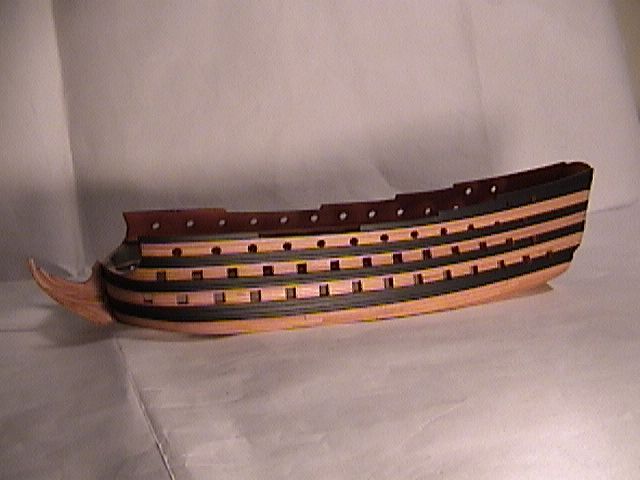
The final photos show the masking tape removed. A bit of touch up (red ochre and black) is required yet. The hull certainly now staring to look like a ship.
I suppose the next step will be to start working on the ship’s interior in earnest. My progress on this will be the subject of the next update. Have a safe and happy holiday everyone! Joyeux Nöel!