return to
  Bad pictures ? Click here
 L'Ambitieux, Le Trois-Ponts du Chevalier de Tourville
March 12, 2003
This update was a bit slow to come because I have been tackling one of the hardest parts of a model ship — the stern galleries. As you will see in this update, the stern galleries are far from complete. In fact, I have made little progress on the stern over the past two months it seems.
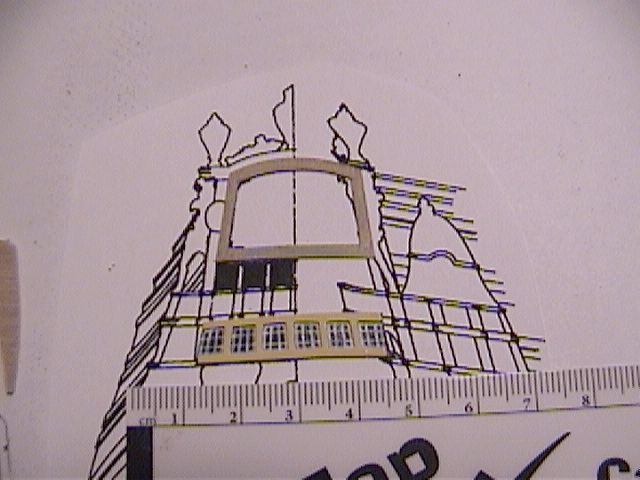
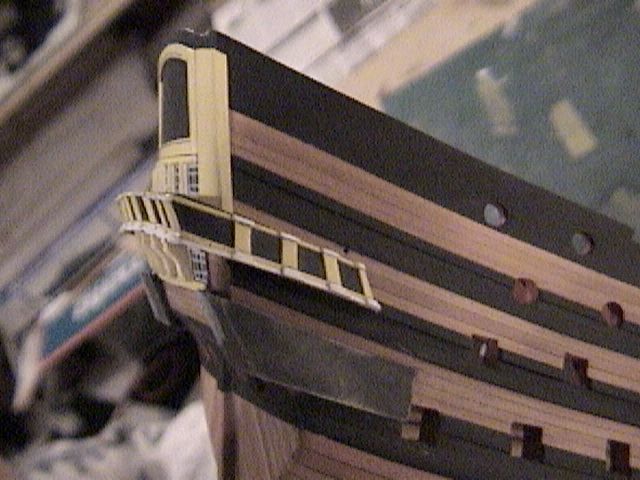
I decided to start from the top of the stern and work my way down. The picture below shows the first parts made — the border for the main stern device and the first set of windows.

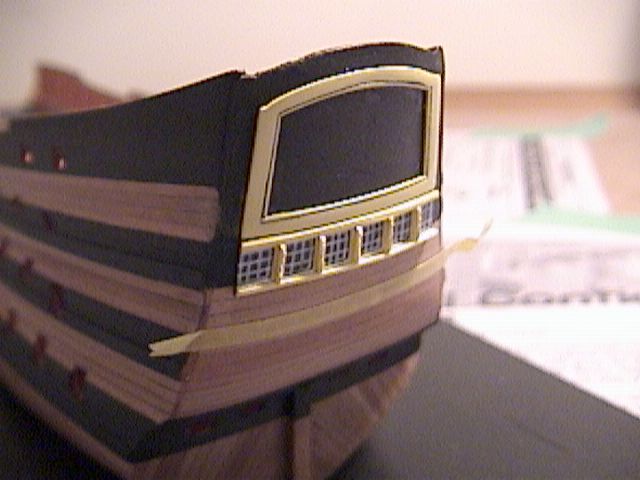
The border or frame was cut out in once piece from a piece of .8mm plywood and painted a pale yellow (Humbrol # 74). The window frames were cut out of the same material and likewise painted pale yellow but the windows themselves are just a piece of black paper with the criss-cross window pane frames marked in white ink. I tried white pencil crayon, white pencil, and white paint but white ink in a technical pen did the trick. The windowpane frames are far too wide and out of scale. Next time I will just photocopy (using a laser copier or printer so there is no ink bleed) a drawing of the window onto white paper and cut out. I think this method will be not only easier but will print the thin white lines of the windowpane frames. The frames between the windows were decorated with blobs of gesso to represent the some carved moldings that likely appeared there. The picture shows the parts painted and added to the stern.

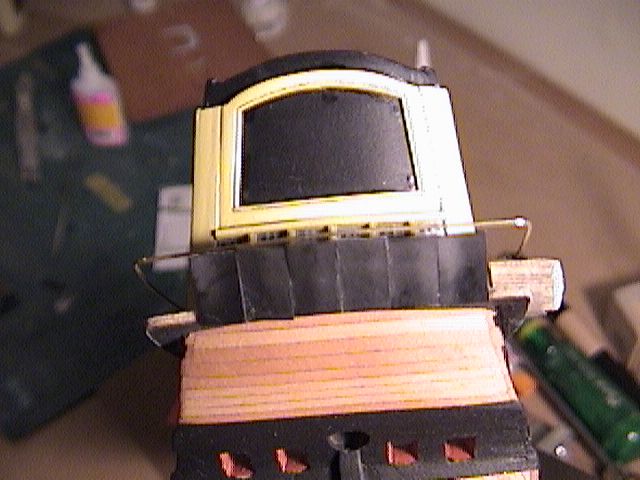
The next step was to build the large balcony that goes all the way around the stern and forms side galleries as well. The photos below show a sub deck cut out of .8mm plywood that was planked over in holly as per the plans.
This part was then glued to the stern. Now for the hard part. I had no idea as to how to make the balcony rail. I tried cutting out pieces of wood, but that didn’t work because the part broke or was far too wide and thick. My solution was to take a piece of fine brass rod and bend it to the shape of the top railing as shown in the picture below.
The two ends of the rail were bent in at a 90-degree angle to form little hooks. A hole on the port and starboard hull sides where drilled into the hull to accept the hooks. To keep the top railing and balcony deck the correct distance apart, a piece of scrap wood was cut and taped between the parts to act as a spacer.
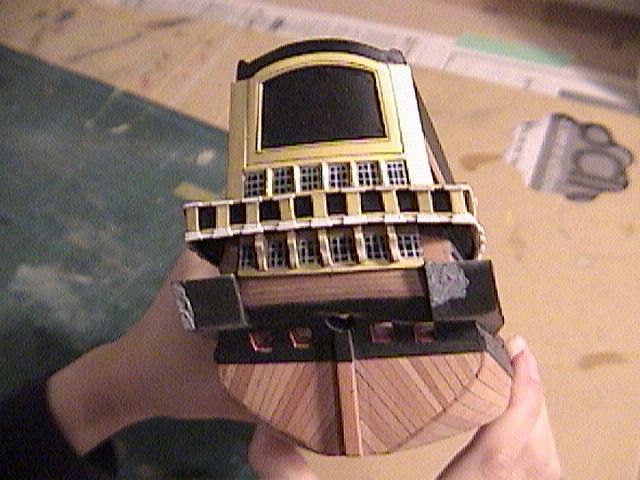
The walls of the balcony were made out of card. I painted some file folder with some Humbrol matt black enamel pain and let it dry. The card received two coats of paint on both sides. I rubbed the paint down between coats with steel wool. This smoothed the paint and gave it a hard finish. A sharp knife was used to cut out little squares that were glued to the balcony deck and railing.
Once the whole balcony was sheathed in card, the entire surface was coated with CA glue and sanded smooth. Any gaps were filled with plastic model putty and rubbed down as shown in the picture below. Once all visible gaps were filled, the whole balcony was painted black.
Now for the fun part — its time to start decorating the balconies with moldings. The moldings are simply strips of card painted pale yellow and strips of .10” square styrene rod. These were carefully glued on and sanded smooth. The moldings seen in the following pictures are a bit rough looking because they are unpainted or have just their first coat of paint. Once all of the basic stern gallery assemblies are complete, I will give them all a finish coat of paint.
After completing the basic construction of the main balcony, I made and added the next set of windows and side gallery balconies using the same procedures. Some knees made out of scrap holly support the upper balcony. The pictures below show all of this work.
That is as far as I have gotten. In the next update I will show more work on the galleries.
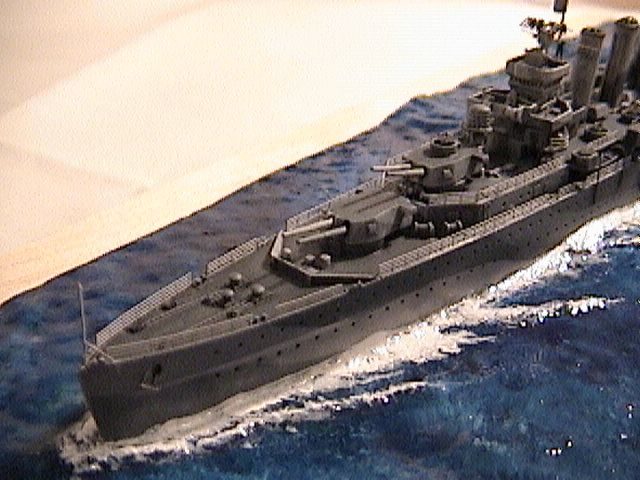
Oh yes, in the previous update I noted I was going to build a nice resin kit. Here’s a photo of my out-of-the-box build of HMS SUSSEX (1942) in 1:700 scale. This kit was a gift from my wife. What a woman!